Quick & Easy No-Churn Cherry Ice Cream: Your Summer (or Anytime) Dream Dessert!
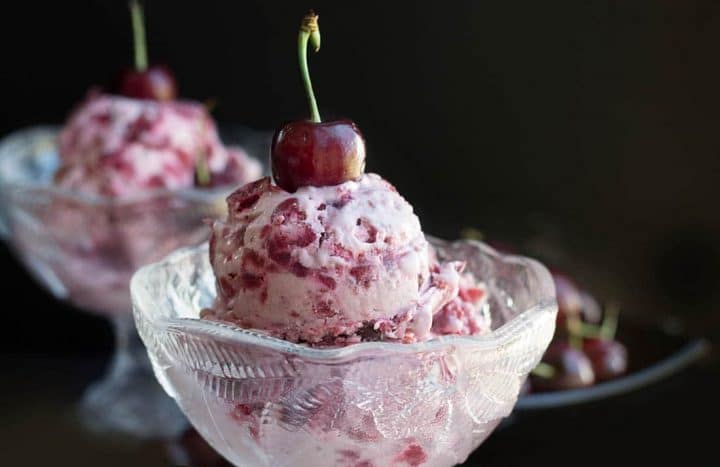
Imagine a vibrant, creamy scoop of homemade cherry ice cream, bursting with natural fruit flavor, melting delightfully on your tongue. Now, imagine achieving this without an ice cream maker, a special churn, or complicated steps. Sounds like a dream, right? Well, it's not! Prepare to discover the magic of homemade cherry ice cream with a rich flavor and no preservatives – a truly quick, easy, and utterly irresistible no-churn recipe that will revolutionize your dessert game.
For too long, the idea of homemade ice cream has been intimidating for many, often associated with bulky machines and lengthy processes. But what if we told you that the best, most natural-tasting cherry ice cream could be yours with minimal effort and just a handful of ingredients? This article will guide you through creating your own batch of delicious quick easy homemade cherry ice cream, ensuring you can enjoy this refreshing treat any day of the year, no special equipment required.
Why Go No-Churn? The Magic of Effortless Indulgence
The beauty of no-churn ice cream lies in its remarkable simplicity and accessibility. Traditional ice cream recipes often call for an ice cream maker, which, while fantastic for enthusiasts, isn't a kitchen staple for everyone. Beyond the equipment, many classic methods involve tempering eggs, cooking a custard base, and then chilling it meticulously before churning – a multi-step process that can deter even the most eager home cook.
No-churn recipes, however, bypass these complexities entirely. They rely on a clever combination of ingredients that, when whipped and frozen, create a wonderfully rich and creamy texture, mimicking the results of traditional churning. This means less time in the kitchen, fewer dishes to wash, and absolutely no stress. For anyone who has longed for the pure, unadulterated taste of homemade ice cream but felt intimidated by the process, no-churn is your culinary liberator. It opens up a world of flavor possibilities, allowing you to create incredible desserts without the need for an expensive gadget. Plus, the satisfaction of serving a dessert made entirely from scratch, free from artificial colors, flavors, or preservatives, is truly unparalleled.
Crafting Your Quick Easy Homemade Cherry Ice Cream: The Secret Ingredients
The genius of this quick easy homemade cherry ice cream recipe lies in its core components, which work in harmony to deliver incredible flavor and texture. Understanding what each ingredient brings to the table is key to mastering this delightful dessert.
- Sweetened Condensed Milk: The Creaminess Catalyst
This unassuming can of liquid gold is the cornerstone of virtually all no-churn ice cream recipes. Sweetened condensed milk serves a dual purpose: it provides ample sweetness, eliminating the need for granulated sugar, and more importantly, its unique composition prevents ice crystals from forming, ensuring a smooth, incredibly creamy texture. For those who, like many, are wary of raw eggs in recipes, condensed milk offers a safe and delicious alternative, providing richness without any culinary anxiety. - Heavy Cream: The Air and Volume Creator
Whipping heavy cream into stiff peaks is what introduces air into your ice cream base, giving it that light, airy, and fluffy quality. When folded with the condensed milk, it forms a stable, voluminous base that freezes beautifully. Always use heavy cream (sometimes called whipping cream) with at least 35% milk fat for the best results, as lower-fat creams won't whip up as effectively. - Cherries: The Star Flavor - Fresh or Frozen?
While fresh cherries are undeniably delightful, the true secret to making this creamy cherry ice cream anytime with frozen cherries lies in their convenience and unexpected benefit. Frozen cherries are available year-round, ensuring you're never far from your next batch of homemade ice cream. What's more, when frozen cherries thaw, they naturally release a beautiful, flavorful juice. This liquid is gold for your ice cream, intensifying the cherry flavor and contributing to the overall moisture and texture. You can use this juice directly in your recipe, or even cook it down slightly for a more concentrated cherry ripple. If using fresh cherries, you'll want to pit and chop them, and perhaps macerate them with a little sugar to encourage juice release. - Optional Enhancements: Elevating the Experience
- Vanilla Extract: A classic complement to almost any dessert, vanilla extract adds warmth and depth to the sweet cherry notes.
- Almond Extract: This is a game-changer! A small splash of almond extract beautifully enhances the natural flavor of cherries, bringing out their fruity essence in a way that will have everyone wondering what your secret ingredient is. It’s a must-try pairing.
- Powdered Sugar: While the sweetened condensed milk provides ample sweetness, you might consider adding a tablespoon or two of powdered sugar to your cherries (after thawing and before draining the juice) if you prefer a sweeter, richer cherry base. Powdered sugar also helps stabilize the whipped cream.
- A Pinch of Salt: A tiny bit of salt can do wonders to balance the sweetness and intensify all the other flavors.
Step-by-Step Guide to Your Dreamy Cherry Ice Cream
Creating your batch of quick easy homemade cherry ice cream is a straightforward process, but following these steps carefully will ensure a perfect result every time.
- Prepare Your Cherries: If using frozen cherries, allow them to thaw completely, ideally in a bowl to catch all the delicious juice. Once thawed, you can roughly chop them if you prefer smaller pieces, or leave them whole for bigger bursts of fruit. Reserve the juice – it's full of flavor! For an even richer cherry component, you can gently simmer the thawed cherries and their juice with a tablespoon or two of sugar for about 5-7 minutes, then let it cool completely. This concentrates the flavor and creates a lovely sauce.
- Whip the Cream: In a large, chilled bowl, pour in your cold heavy cream. Using an electric mixer (handheld or stand mixer) with the whisk attachment, beat the cream on medium-high speed until stiff peaks form. This means when you lift the whisk, the cream holds its shape firmly. Be careful not to overmix, or you'll end up with butter!
- Fold in Condensed Milk: Gently pour the sweetened condensed milk into the whipped cream. Using a spatula, carefully fold the two together until just combined. The key here is to fold, not stir vigorously, to maintain the airiness of the whipped cream.
- Add Flavors and Cherries: Stir in your vanilla extract, almond extract (if using), and a pinch of salt. Then, gently fold in your prepared cherries and a portion of their reserved juice. If you cooked your cherries, incorporate the cooled cherry mixture. You can swirl in extra cherry juice or sauce for a marbled effect or mix it all in for an even flavor distribution.
- Pre-Chill and Freeze: For the best texture, pre-chilling your ice cream base for 30 minutes in the fridge before freezing can make a noticeable difference in how quickly it sets and its final creaminess. Pour the mixture into a freezer-safe container (a loaf pan, an airtight container, or a metal tin works well). Cover tightly with plastic wrap or a lid.
- Freeze Until Firm: Place the container in the freezer for at least 6-8 hours, or preferably overnight, until the ice cream is firm. For best results, avoid opening the freezer door frequently during this time.
When ready to serve, let the ice cream sit at room temperature for a few minutes to soften slightly for easier scooping. Enjoy it plain, or with a drizzle of extra cherry sauce, a sprinkle of chocolate shavings, or a dollop of fresh whipped cream.
Tips for the Perfect Quick Easy Homemade Cherry Ice Cream Every Time
While this recipe is incredibly forgiving, a few expert tips can elevate your quick easy homemade cherry ice cream from great to absolutely divine.
- Use Cold Ingredients: Always ensure your heavy cream, bowl, and whisk attachment are thoroughly chilled before whipping. This helps the cream whip up faster and achieve stiffer peaks, leading to a lighter, airier ice cream.
- Don't Over-Thaw Cherries: While you want the cherries to thaw and release their juice, try not to let them sit out for too long at room temperature once thawed. Keeping them cool until they're folded into the base helps maintain the integrity of the ice cream mixture.
- Adjust Sweetness to Taste: The sweetness from condensed milk is often sufficient, especially with the natural sweetness of cherries. However, if you have a sweeter tooth or your cherries are particularly tart, feel free to add a little extra powdered sugar to your cherries before combining them. Taste the cherry mixture before folding it into the cream.
- Experiment with Textures: If you love chunks, fold in some additional chopped fresh or frozen (then thawed) cherries during the last few minutes of mixing. For a smoother ice cream, you can lightly blend a portion of your thawed cherries and their juice before adding them.
- Consider Your Freezer Container: A metal loaf pan or an aluminum tin can help the ice cream freeze faster and more evenly than plastic containers. Ensure whatever you use is airtight to prevent freezer burn and keep your ice cream fresh.
- Flavor Variations are Endless: Once you master this cherry base, the world of no-churn ice cream opens up! Try adding a swirl of chocolate fudge, a sprinkle of toasted almonds, or even a hint of lemon zest to brighten the cherry flavor. Other fruits like raspberries, blueberries, or peaches also work wonderfully in this type of recipe.
- Storage is Key: Store your homemade ice cream in an airtight container to prevent ice crystals from forming on the surface. It will typically last for about 1-2 weeks in the freezer, though it's so delicious, it rarely lasts that long!
Conclusion
Gone are the days when decadent homemade ice cream was reserved for those with specialized equipment. This quick easy homemade cherry ice cream recipe proves that incredible flavor and luxurious texture are within everyone's reach. By harnessing the simple power of sweetened condensed milk and whipped cream, combined with the natural goodness of cherries, you can create a dessert that rivals any gourmet scoop shop – without any artificial ingredients or preservatives. It's natural, light, creamy, and bursting with authentic cherry flavor. So, ditch the store-bought tubs and embrace the joy of crafting your own frozen masterpiece. Once you experience how effortless and utterly delicious this no-churn cherry ice cream is, you'll find yourself making it again and again, turning every day into a sweet celebration.
